Skimmeroutdoors.com
  • Home
    • Home 2013
    • Links
  • Reports
    • User Fishing Reports >
      • Upload a Fishing Report
    • Hunting Reports >
      • Upload a Hunting Report
    • Regulations
  • Adventures
    • Travel Log
  • Charter Capt. Al
  • TV
  • Boating
    • Another Mako Restoration
    • For Sale
  • Contact Us
    • Stock Photography

Post Title.

1/31/2011

0 Comments

 
Picture
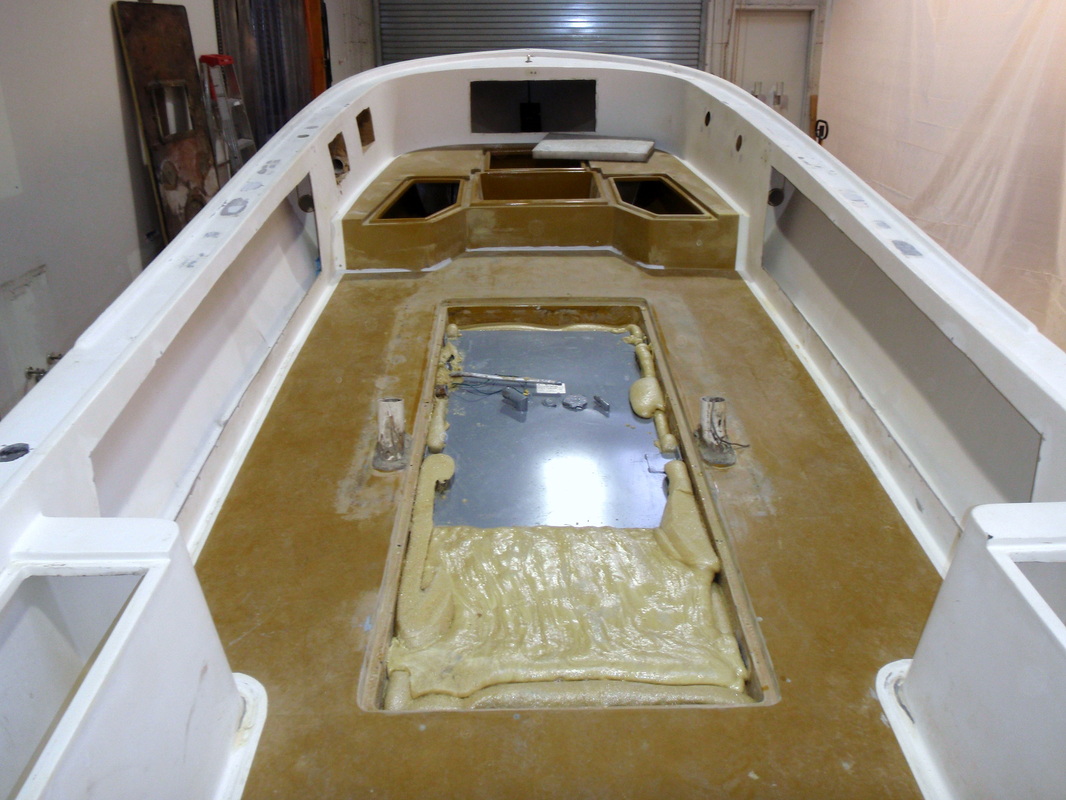
We foamed the tank into place with 4 pound foam from U.S. Composites. This foam is hard as a rock and will not absorb water. It is locked into place and we are now ready to install the coffin cover. Pete Johnston will do that tomorrow and seal the seam with cabosil filler. We will counter sink the coffin screws and also seal them with epoxy so that no water can enter the tank area.
Picture
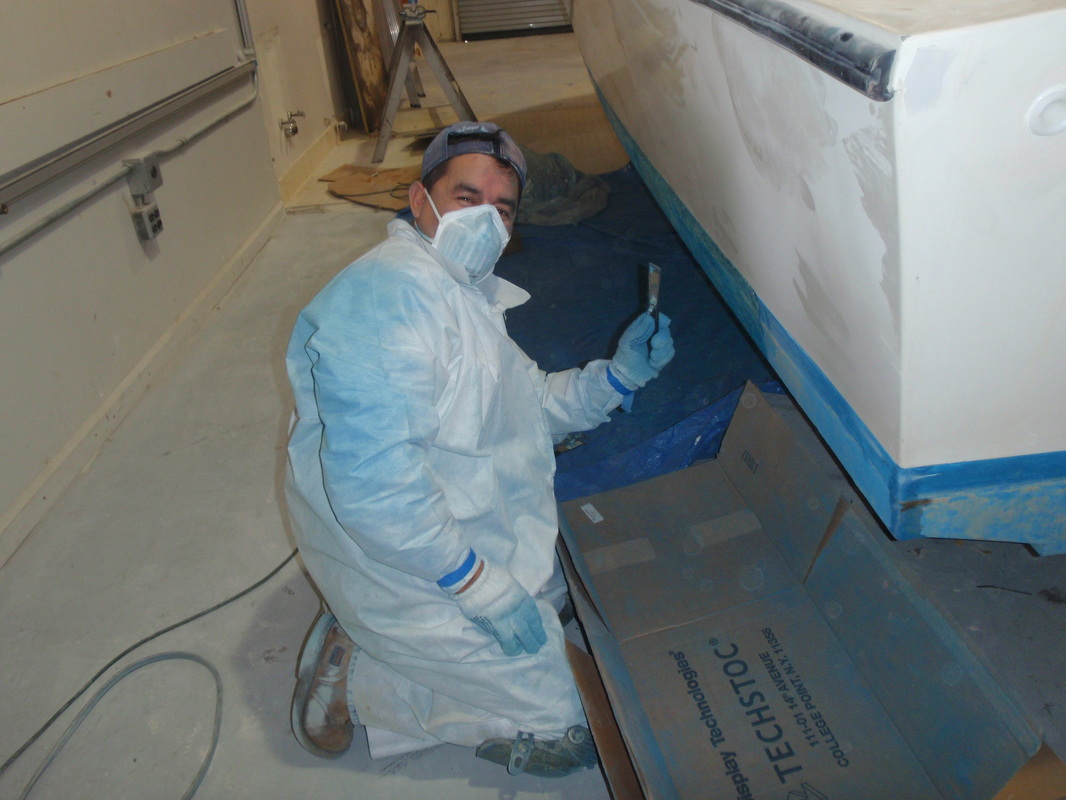
Here is Carlos working his butt off scraping the bottom of the boat by hand. This is the only way that all old paint can be removed without damaging the gel coat finish. He uses a hand scraper to remove old layers of paint and then sands with 80 grit to get it down to the gel coat with no voids. 
Picture
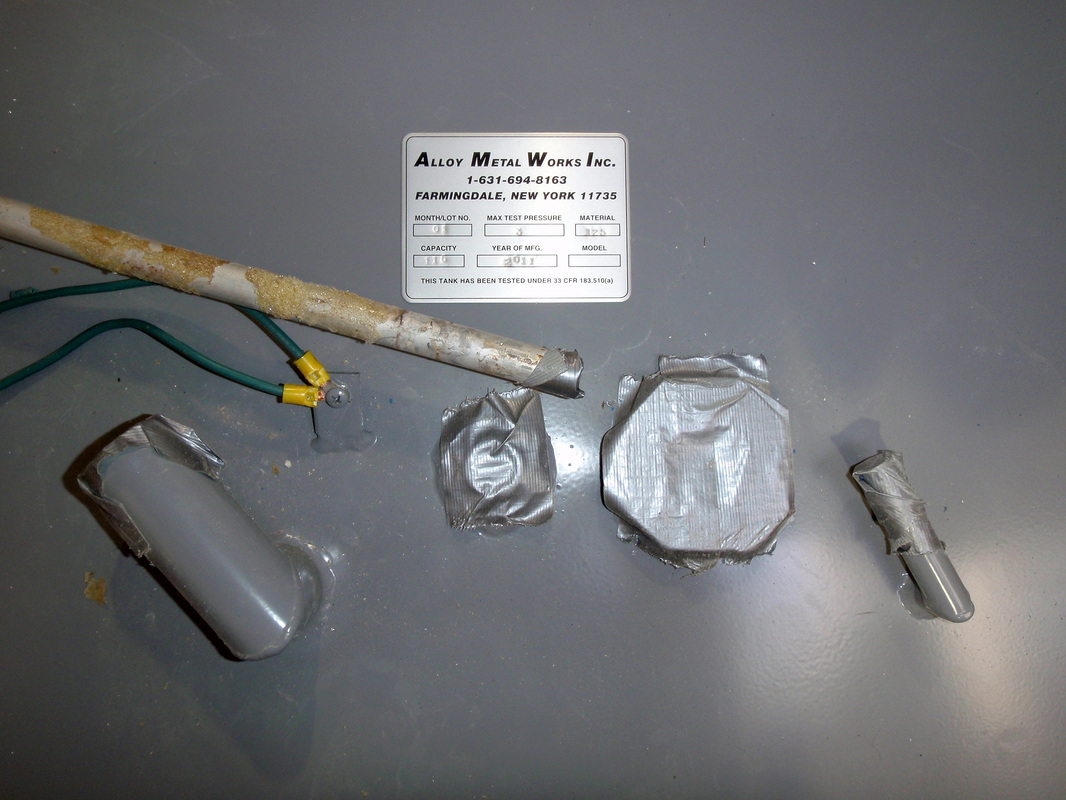
This is the business end of the tank all organized to be within the opening of the inspection hatch of the tank coffin cover. Fill pipe, pick up tube opening, sender opening and vent pipe left to right. All connections will be made with top quality components. Tomorrow I will install the vent and fill hoses and sender. I will complete the pick up plumbing when the boat is back from painting.

Picture
Today we installed the new gas tank. It was a big job but we got it done. The new tank made by Phil at Alloy Welding fit like a glove. It is 115 gallons and powder coated. Here it is nestled into the coffin and screwed into place waiting for the foam bedding.

This is your new blog post. Click here and start typing, or drag in elements from the top bar.
0 Comments

No Title

1/6/2011

1 Comment

 
Picture
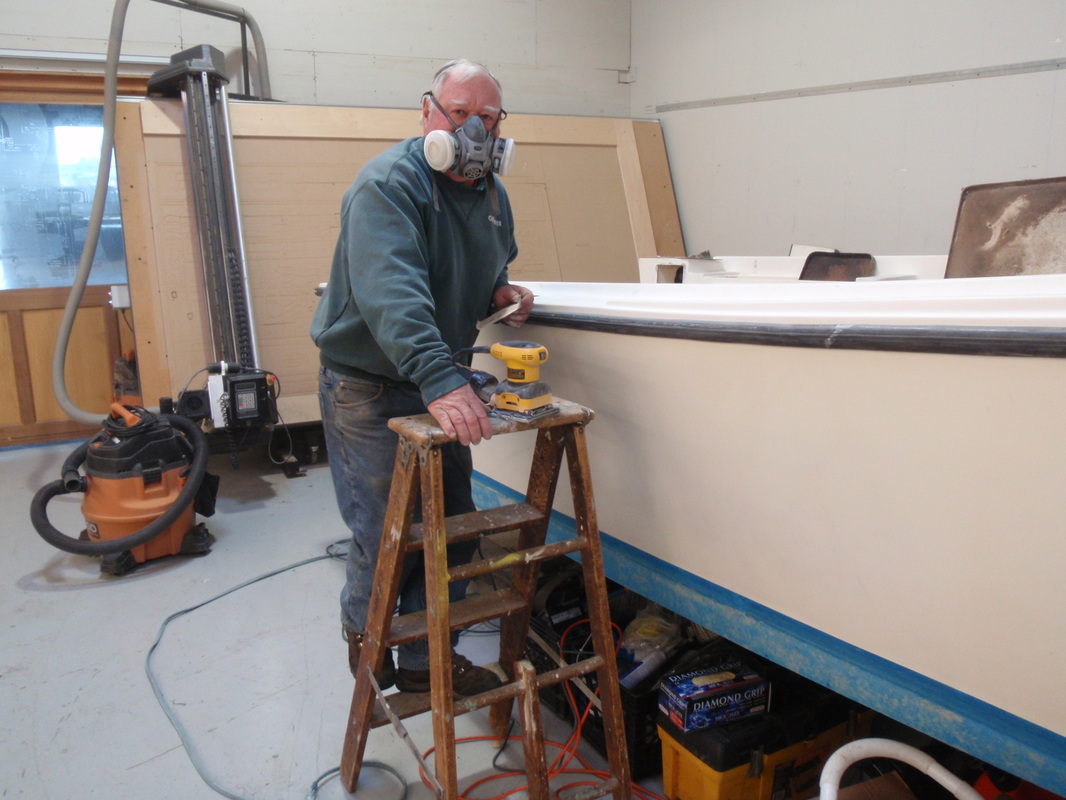
Today we got Pete Johnston into action. He is the master of fiberglass. Pete sanded all the dings and holes and then applied cabosil and began plugging all holes. Tomorrow he will continue the process. I sanded what teak will be put back on the boat, the anchor locker hatch, console hatch, console radio box and the trim for the console glove box.

1 Comment

Post Title.

1/5/2011

0 Comments

 
Picture
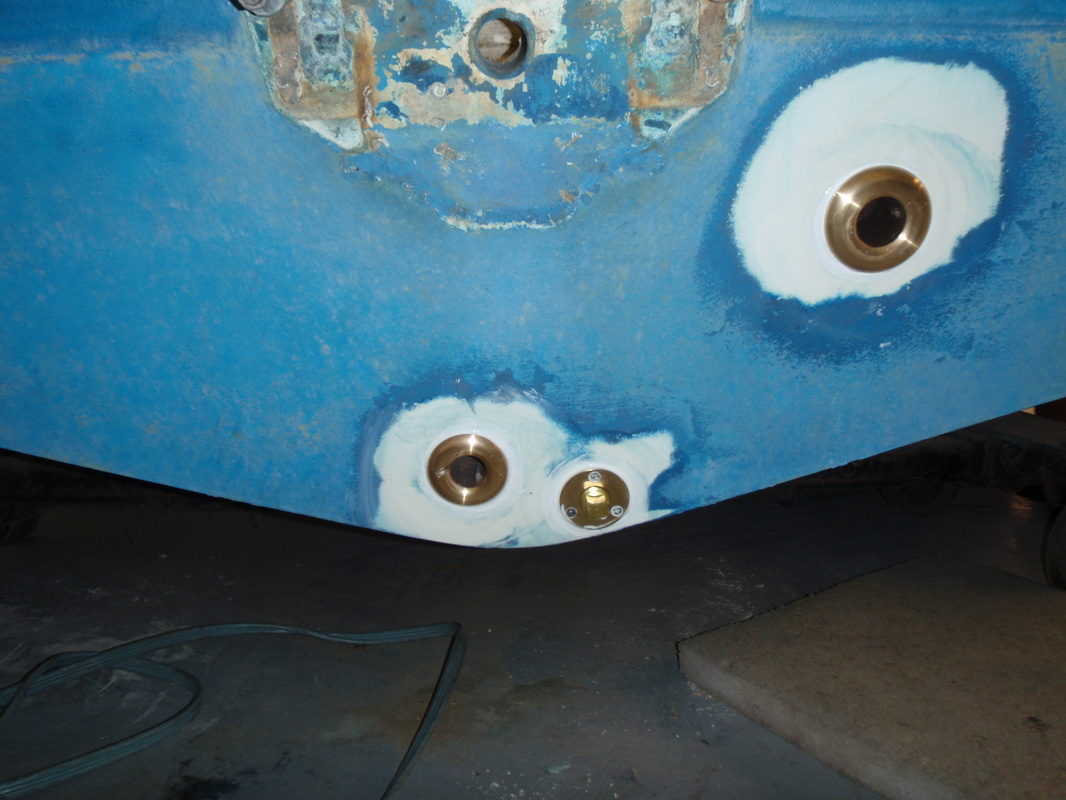
The outside fittings for the lower drain, the Garboard drain plug to empty the bilge when out of water and the upper drain farthest to the right. All through hull and through bait well mushrooms were bedded with 5200. The two fittings on the upper end of the well for incoming and outgoing are Marelon. 1/2 inch for incoming water from the pump and 1 1/4 outflow for the top drain.

Picture
This is a shot of the two drains for the live well. The one on the left is the passive drain from the bottom of the tank. It is 1 inch diameter. I installed a one inch extra length through hull bronze mushroom with full flow Groco ball valve and full flow nipple and connected the hose to the bottom drain of the tank.
On the right is the passive top drain. This drain keeps water from flowing out of the lid of the bait well under pressure from the pump. I did it in 1 1/4 inch to make sure the water would flow well with minimum pitch. It works great on my boat so I am sure it will work on Tony's boat as well.

Picture
For the water pick up I installed a clamshell South Bay Strainer through the hull with a half inch sea cock ball valve and 5/8 high pressure tubing.

Picture
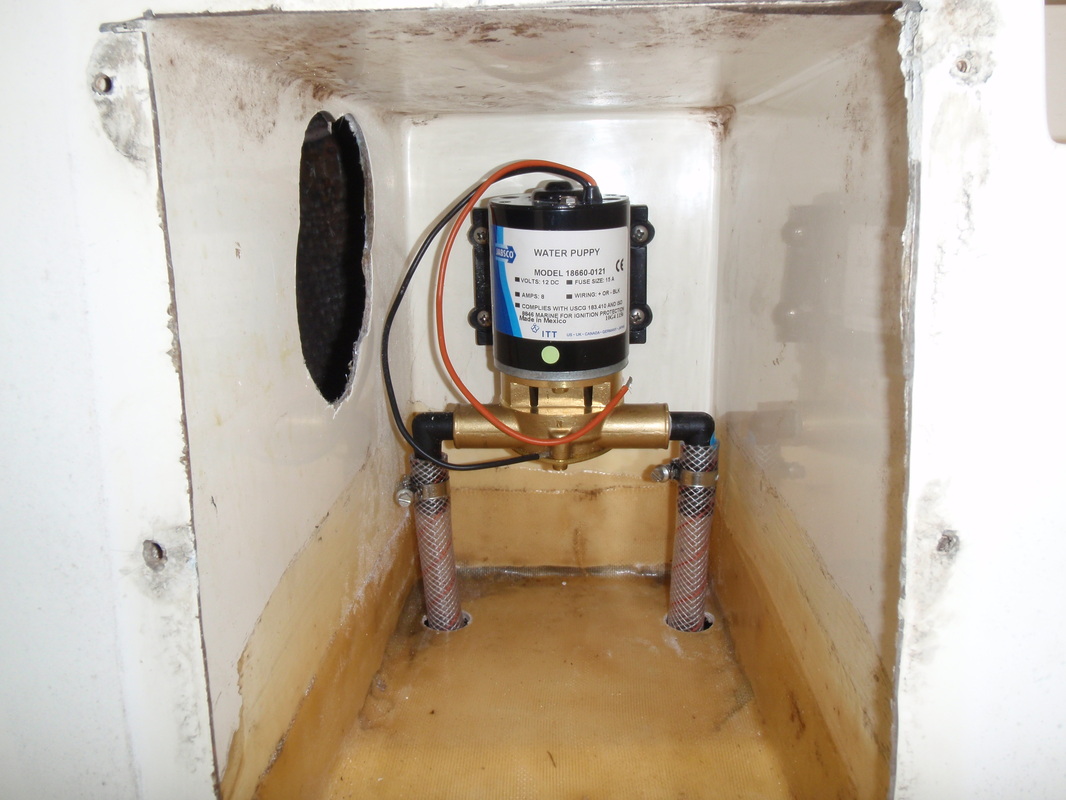
I did a bunch of work on Tony's boat the past few days. It was all about plumbing. Here is the bait well pump installed in the aft battery box on the port side. This pump has served me well over the years. I run it all day and it lasts for years. It eats up seaweed so there is never a plugged up pump. 

This is your new blog post. Click here and start typing, or drag in elements from the top bar.
0 Comments

    Capt. Al Lorenzetti

    Fishing and hunting for 50 years and now in the boat restoration business. Lots of fun.

    (Click here to see the restoration of the Skimmer )

    Archives

    April 2011
    March 2011
    February 2011
    January 2011
    December 2010

    Picture
    Picture
    Picture

    RSS Feed

© 2014 skimmeroutdoors.com